

5 Simple Network Tests to Fix Common Smart Home Issues

🧠 1. Sanity Check Your DNS
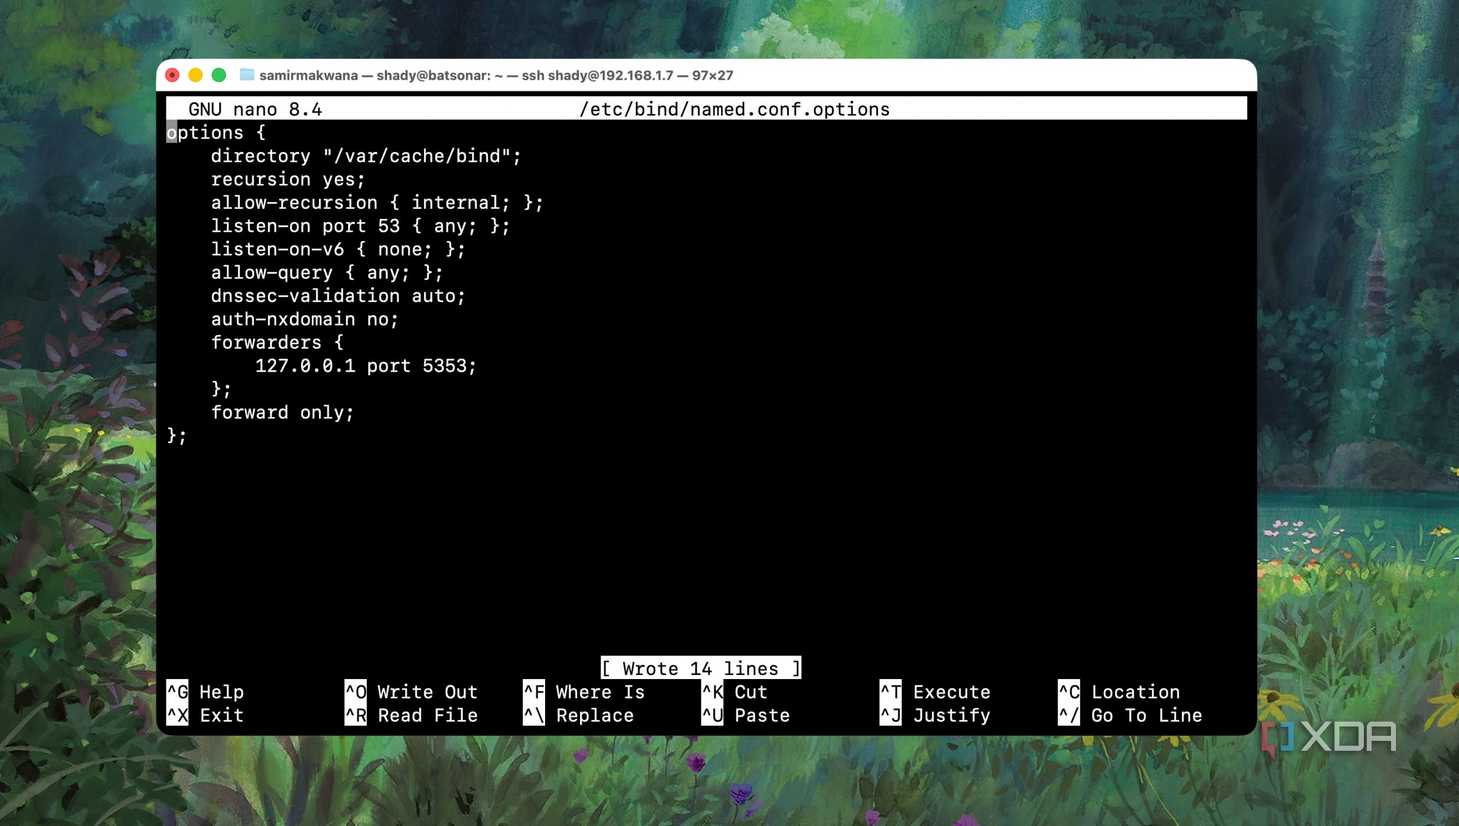
Switch to Unbound for Privacy and Better Control
Most users stick with their ISP’s DNS or switch to public DNS providers like Google or Cloudflare. While fast, they often compromise privacy and data visibility.
By setting up Unbound, a local recursive DNS resolver, you gain:
✅ Complete control over DNS traffic
✅ Local caching for faster resolution
✅ Detailed query logs to see which devices are connecting where
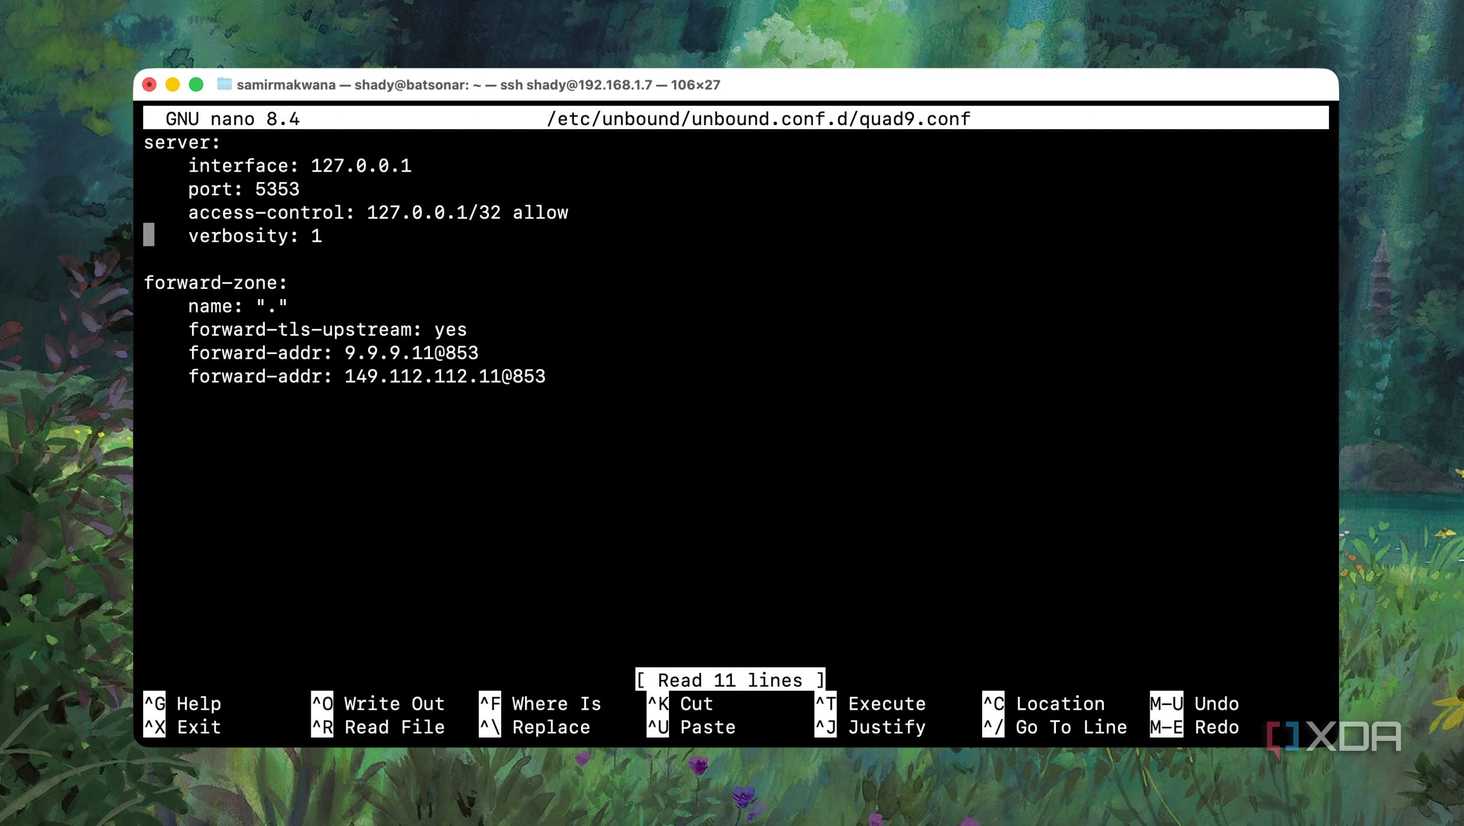
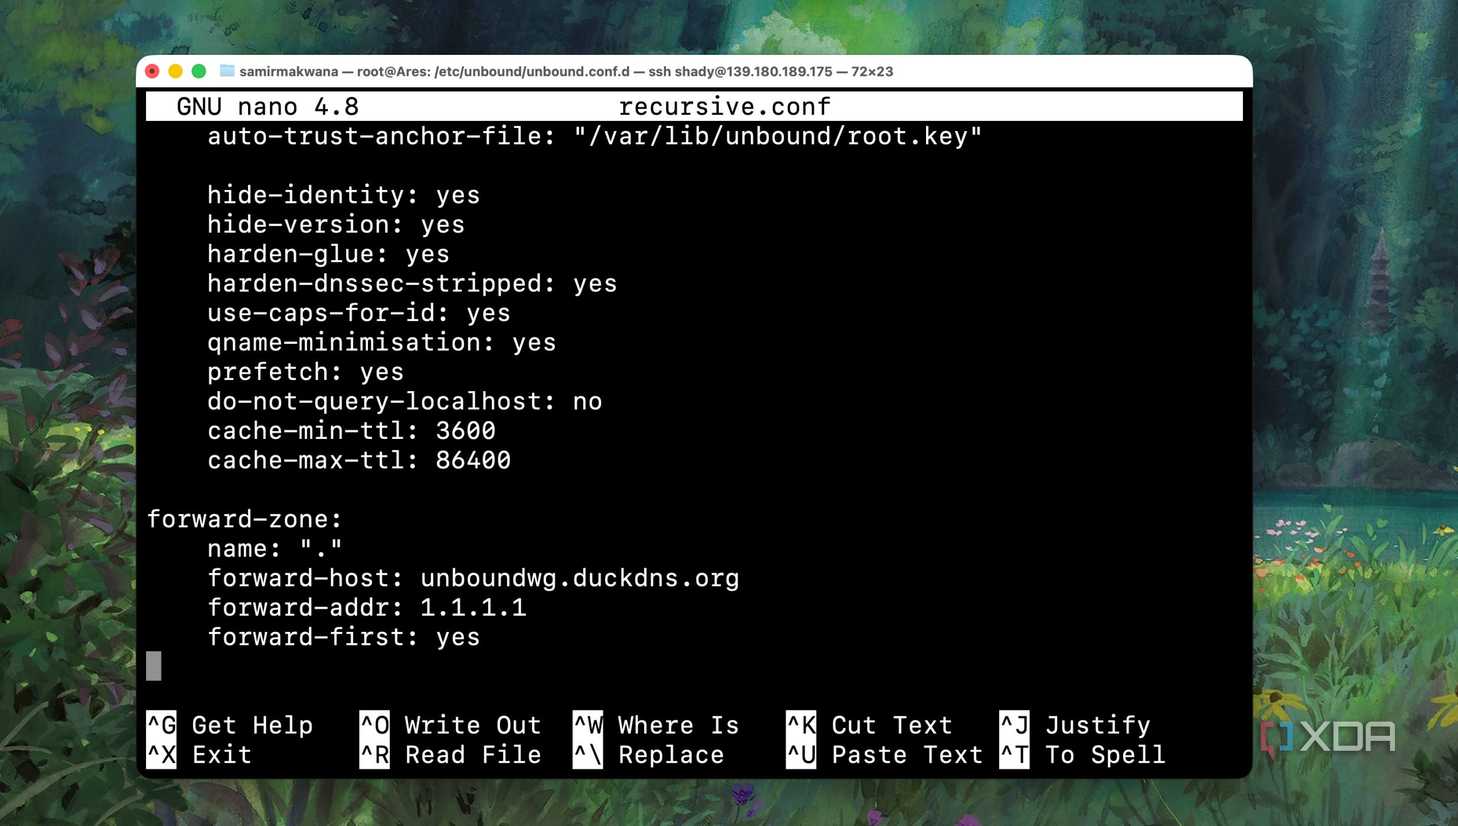
Use those logs to identify unusual or excessive traffic from specific smart devices. Keep in mind that Unbound takes some time to collect data, so let it “warm up.” It’s ideal for homes where devices don’t rely heavily on cloud servers.
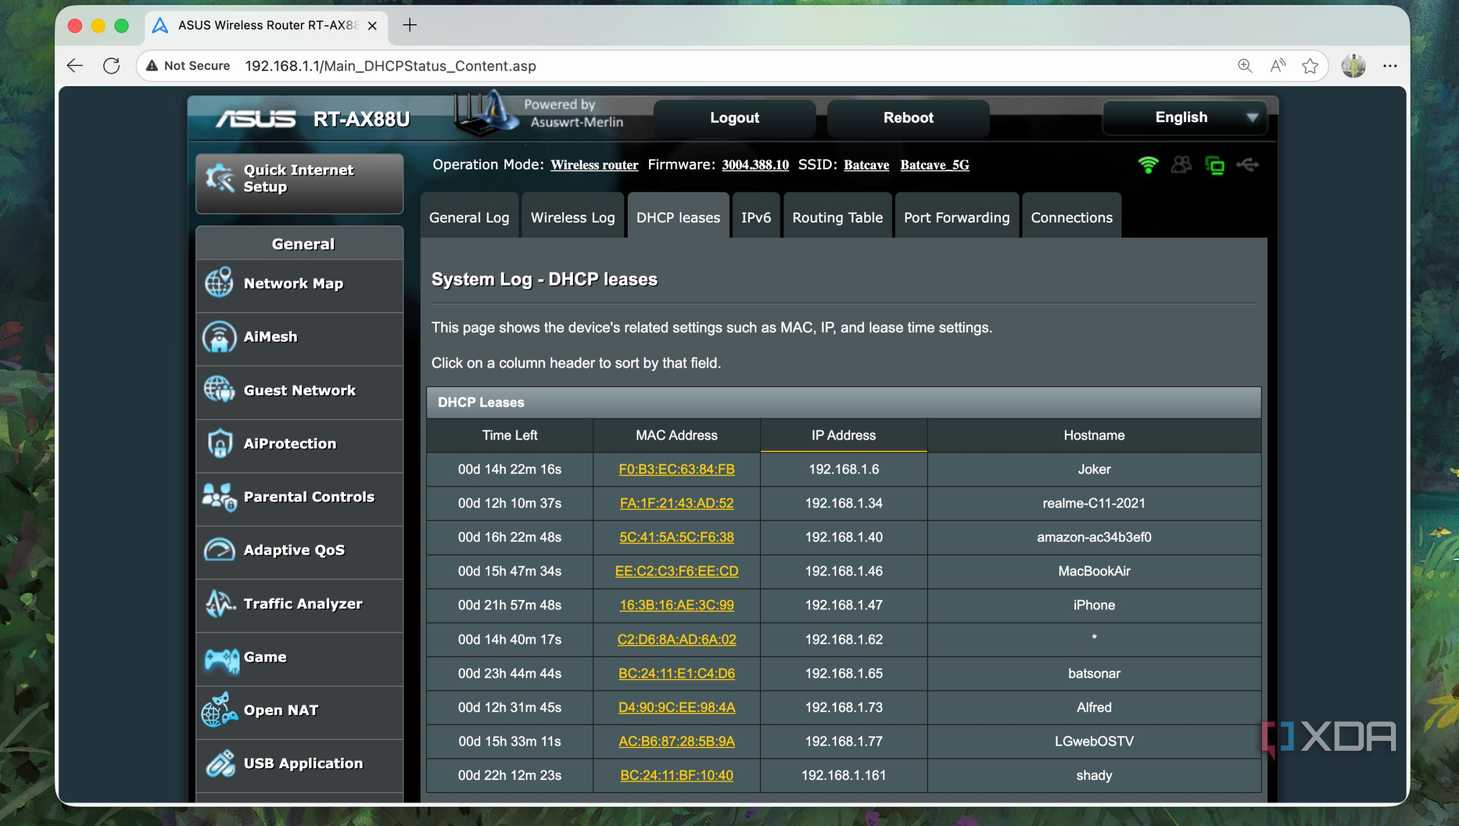
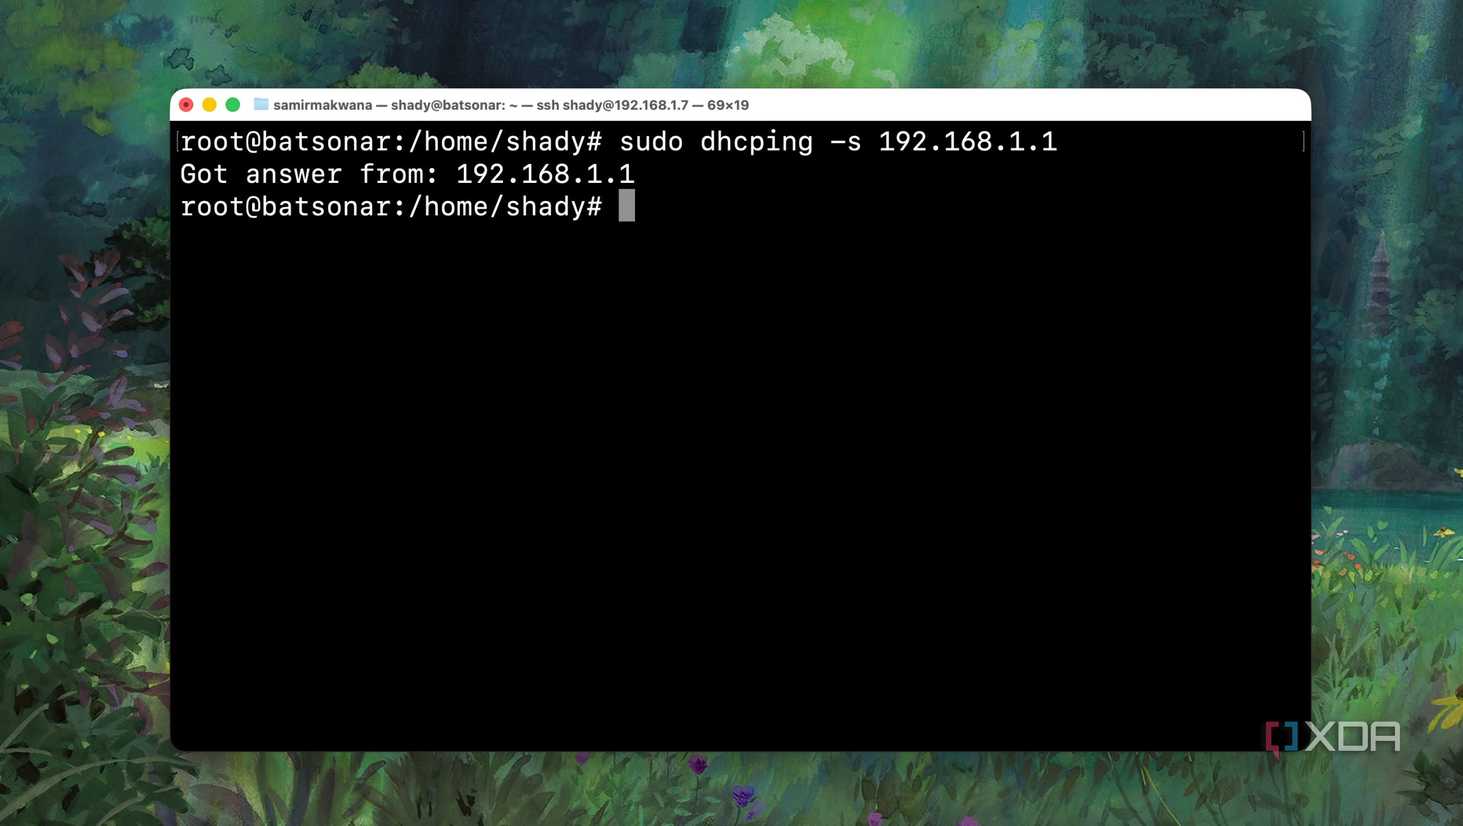
💻 2. Verify Your DHCP Leases
Avoid IP Address Conflicts and Connection Drops
Every device in your smart home needs a unique IP address. If two gadgets share the same address, expect connection chaos.
Check your router’s DHCP lease table for:
-
Device hostname
-
IP and MAC address
-
Lease expiration time
You can also test DHCP responsiveness using the dhcping tool:
dhcping -s <router-ip>
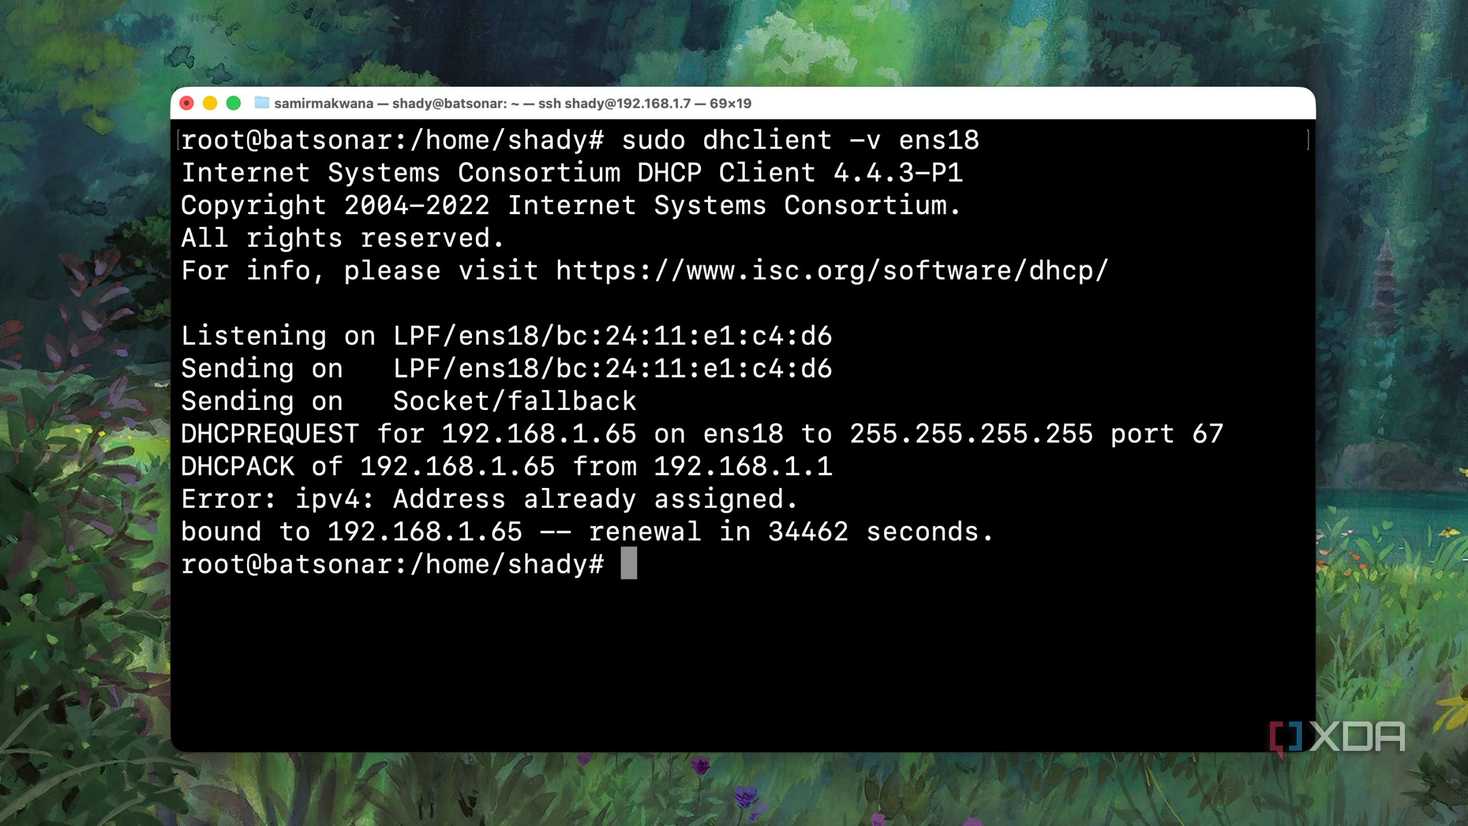
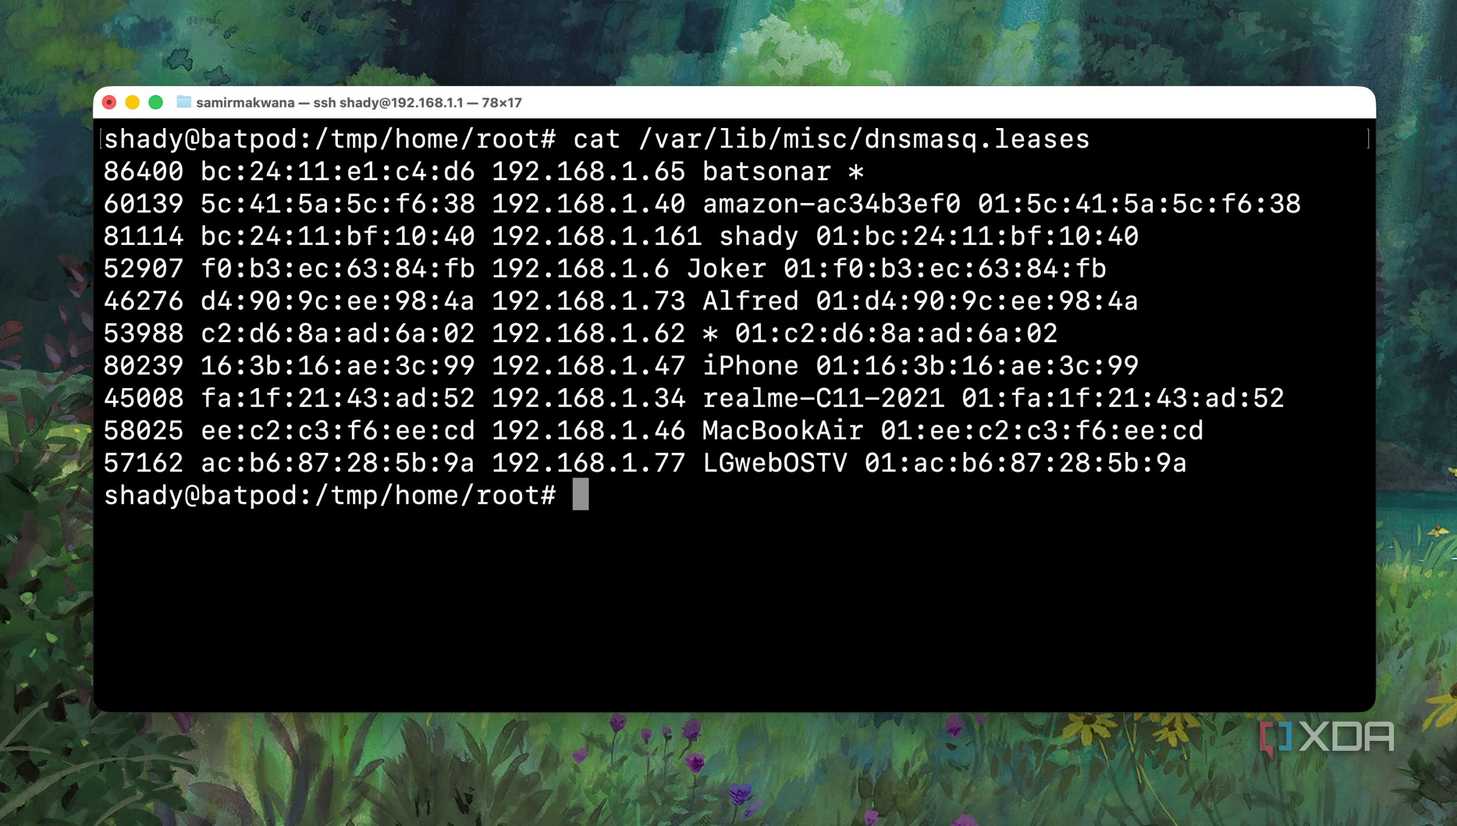
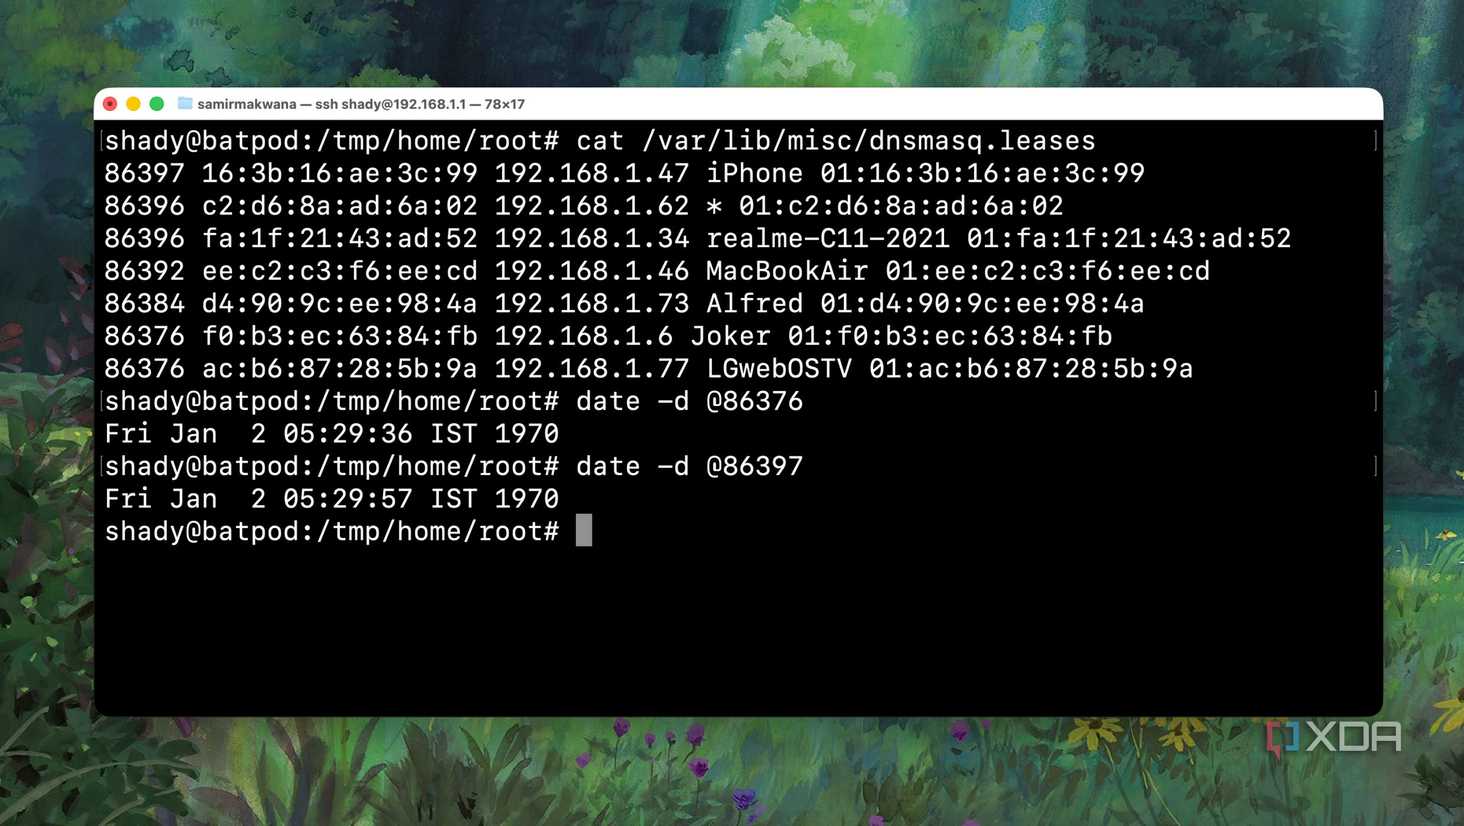
If you’re comfortable with SSH, log into your router and review the DHCP log files. On routers running dnsmasq, check /var/lib/misc/ for current leases.
These quick checks prevent IP conflicts and keep all your devices communicating smoothly.
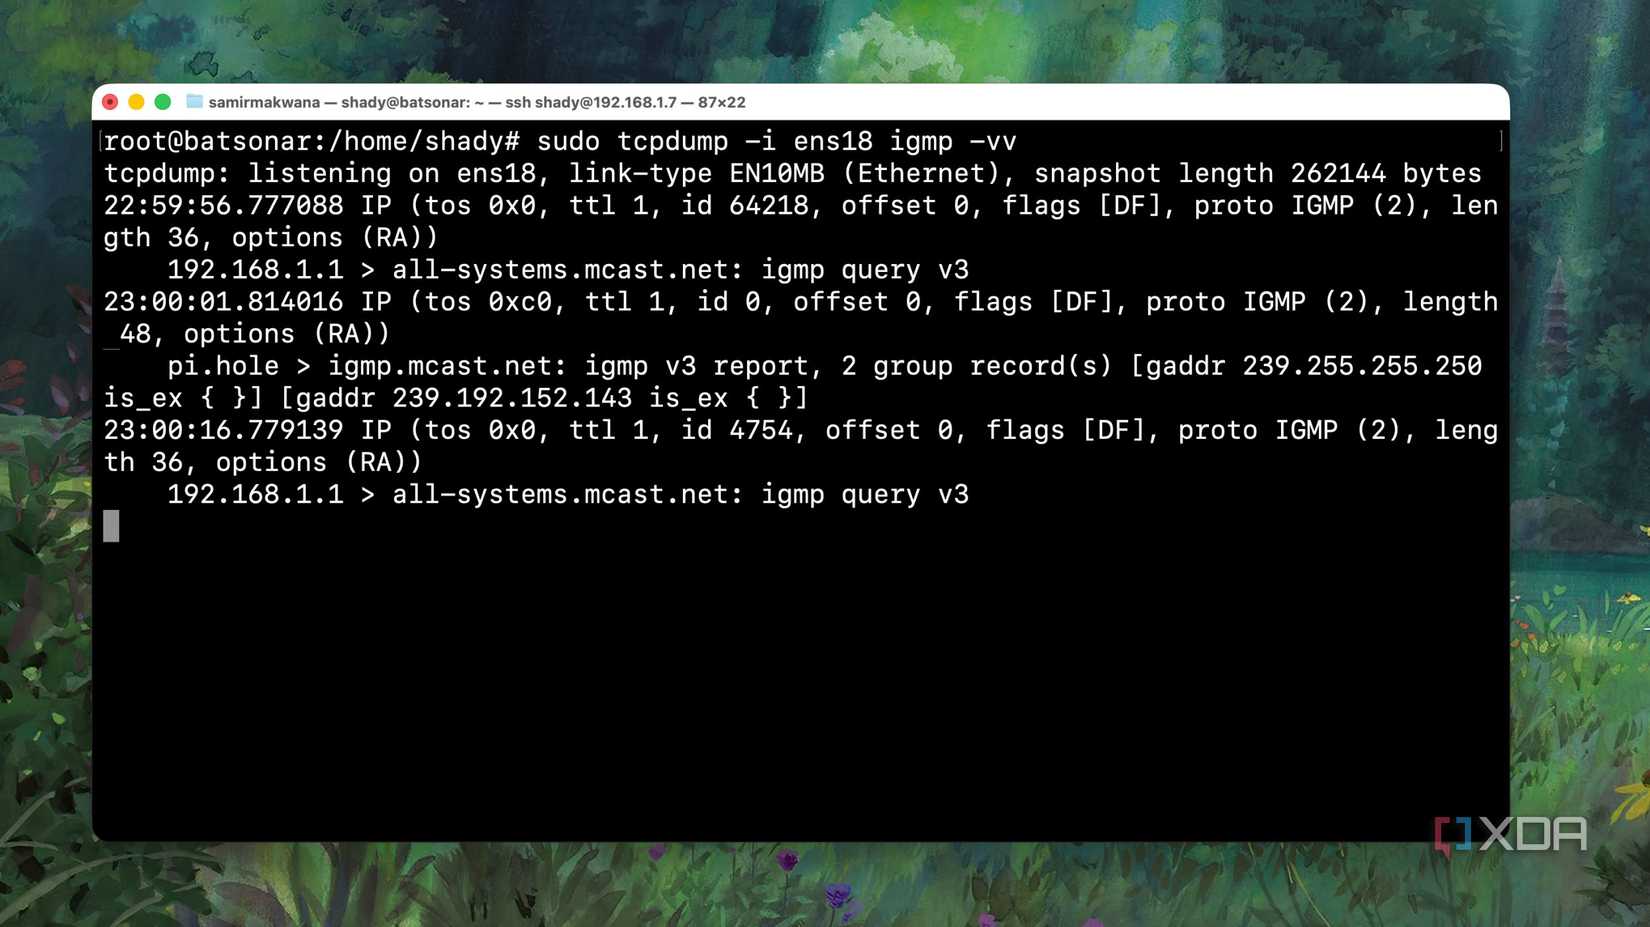
🌐 3. Look for Multicast Flooding
Stop Devices from Overloading Your Network
Multicast traffic allows your smart lights, plugs, and cameras to discover each other—but too much can cause congestion and make devices disappear from the network.
Start by enabling IGMP Snooping on your router to manage multicast traffic efficiently.
Then run these commands:
avahi-browse -a --resolve
sudo tcpdump -ni any udp port 5353 -vv
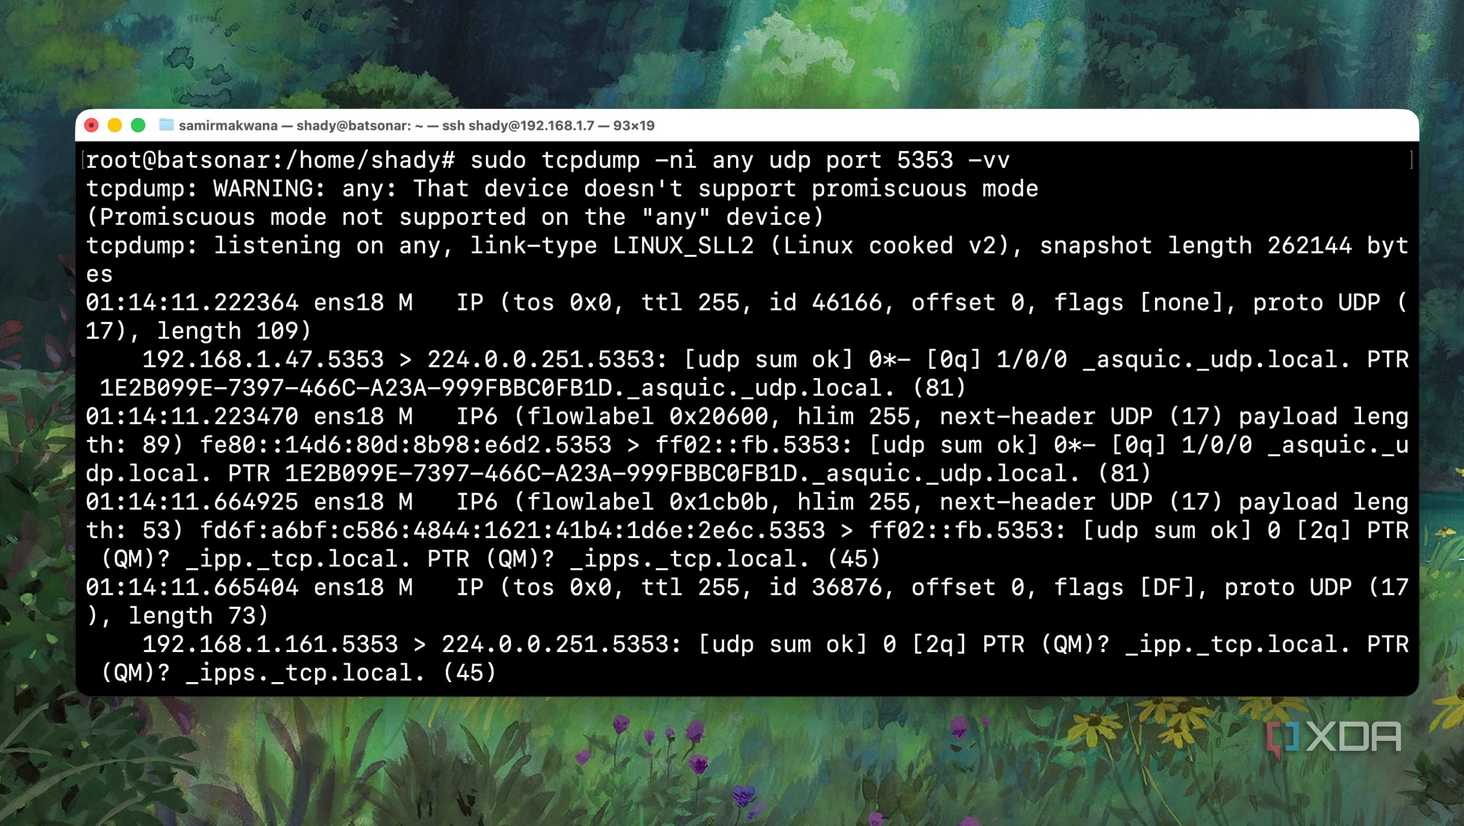

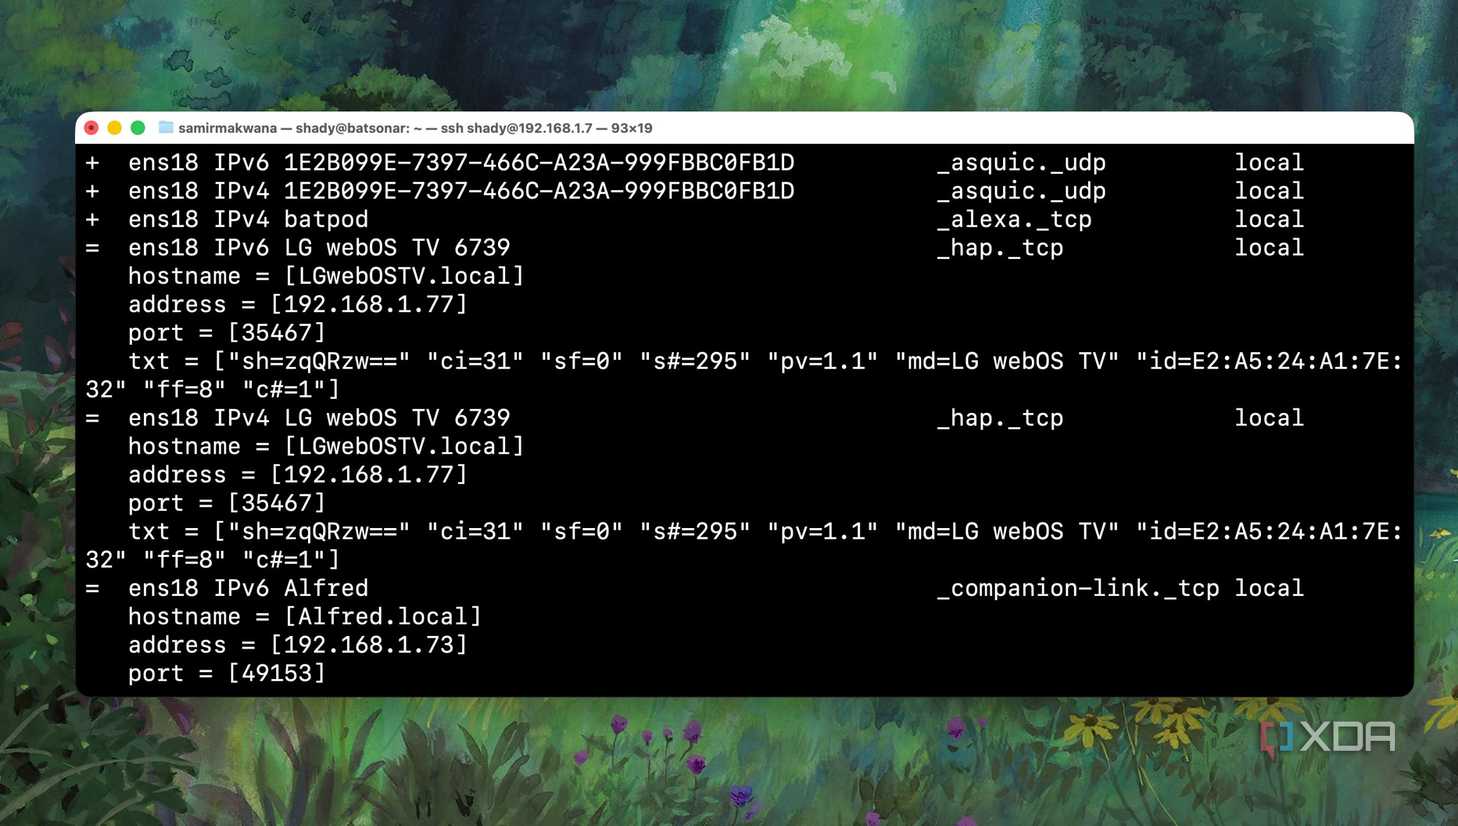

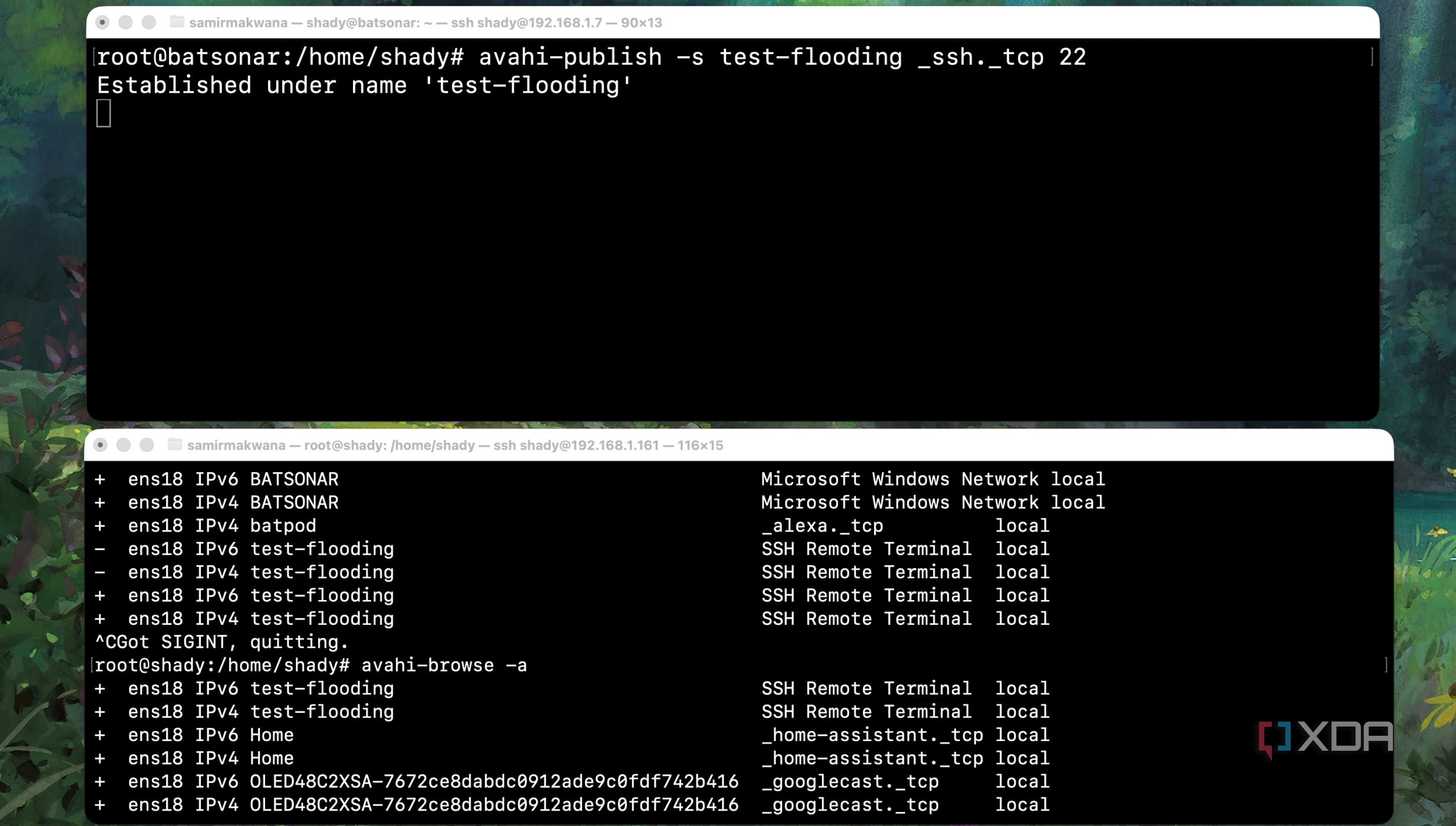
These tools help you identify which devices are sending excessive multicast packets and possibly slowing everything down.
⚡ 4. Detect Broadcast Storms
Prevent Network Slowdowns and Freezes

A broadcast storm happens when misconfigured devices endlessly loop network packets, saturating your bandwidth.
To check, run this command:
If you’re seeing hundreds of packets per second, that’s a clear sign of a storm.
Alternatively, use Wireshark for a visual representation of packet flooding.
Fixing a broadcast storm can dramatically improve your smart home’s reliability and responsiveness.
🔄 5. Enable IGMP Querier
Efficient Multicast Traffic Management
Even with IGMP Snooping turned on, your network still needs a querier to organize multicast traffic. Without it, multicast data floods every VLAN port—slowing everything down.
Test for an active querier with:
If there’s no response, enable the IGMP Querier option in your router or switch settings.
In smaller setups, a Linux-based gateway can serve as an IGMP proxy and handle this function.
🧾 Final Tip: Use Logs to Your Advantage
Logs are gold when it comes to smart home network troubleshooting.
Router logs, Home Assistant data, and device-specific reports reveal patterns—like DNS failures or dropped leases—that lead straight to the root cause.
If your setup is large, consider segmenting smart devices into a dedicated VLAN. It boosts security, reduces interference, and keeps your main network stable.
✅ Key Takeaway
Smart homes don’t have to be fragile.
With these five network tests, you can regain control, fix hidden connectivity issues, and make your automation system faster, more reliable, and more secure.


0 Comments